
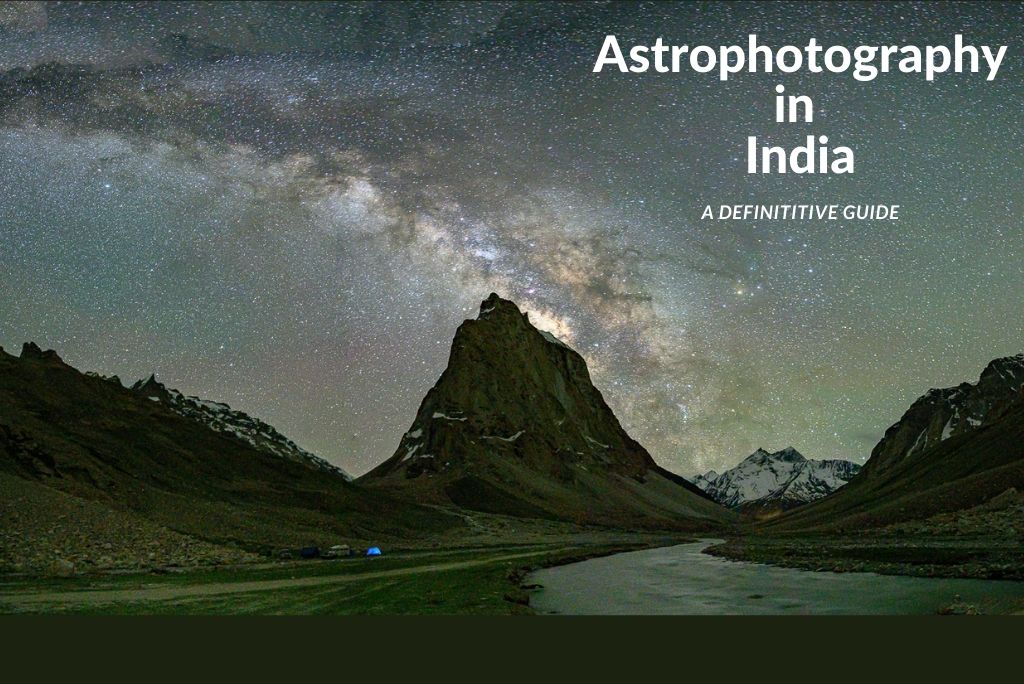
Best Places Guide to Astrophotography / Night Sky PhotographyTour in India
Join Saurabh Chatterjee's Milky Way Photography Tours in India
See my pictures of Milky Way in better resolution here.
My first attempt to shooting the Milky Way
I will start with my story of how I started doing astrophotography.
I went for a trek to Chandrakhani Pass led by my wife Smita.
In the mountains, it is a good idea to drink a lot of water but probably I overdid it that night.
It was the most difficult day of our trek. We were camping on the snow. Low temperature and high altitude. As luck would have it, I couldn't resist going out for a leak. After that, I looked around and saw something unusual in the sky. There was something in the sky, I has never seen, a very bright and colorful cloud. I thought I must capture it.
I had never seen something like this colorful smoking cloud before.
I took out my camera and tripod and tried to take a few shots. I had never done this before. But based on the knowledge I had, I was able to take a picture with some trial and error.
I posted the picture later in a Facebook group of The Himalayan Club, the place where you will find some of the most knowledgeable people related to the mountains. That's when I came to know what it was.
I had captured the Milky Way.
This episode opened my eyes to a new world of the opportunities that I get while traveling in the hills.
My First Milky Way shot at Chandrakhani Pass trek base camp shot with a Nikon D90, I used to have more than a decade back.
Astrophotography Courses In India
I searched for some astrophotography courses but could not find any. I did more and more research and learned the tricks of the trade more by trial and error and experimentation.
I’m glad that now more and more people are taking astrophotography as a serious hobby and I'm there to guide them.
So, if you want to learn more about how to do it, join someone who does it, you will know everything. No matter how many Youtube videos you watch, unless you have hands-on experience, you might struggle on the field.
Once you know how to do it, everything is up to you, just like driving.
I also conduct Photography Tours in India and around and one of my focuses is Astrophotography - Shooting the Milky Way and Star Trails.
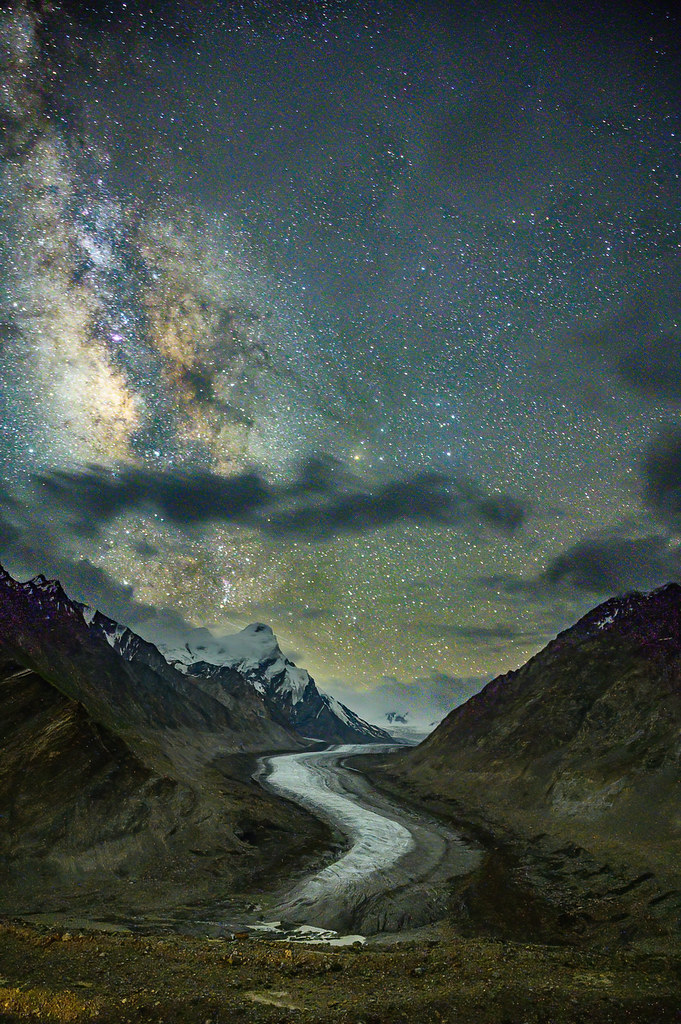
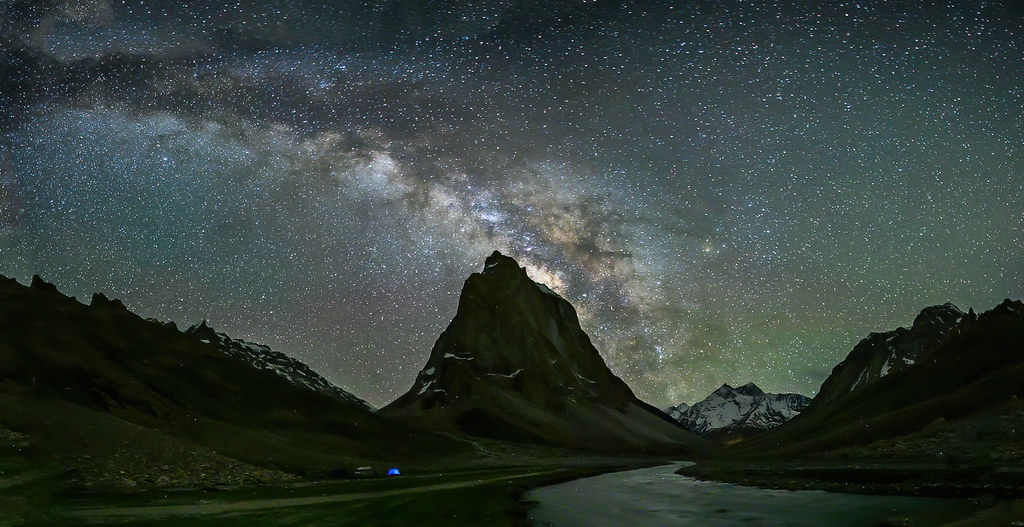
Drang Drung Glacier, our campsite shot during our Photography Tour to Zanskar Valley, Ladakh
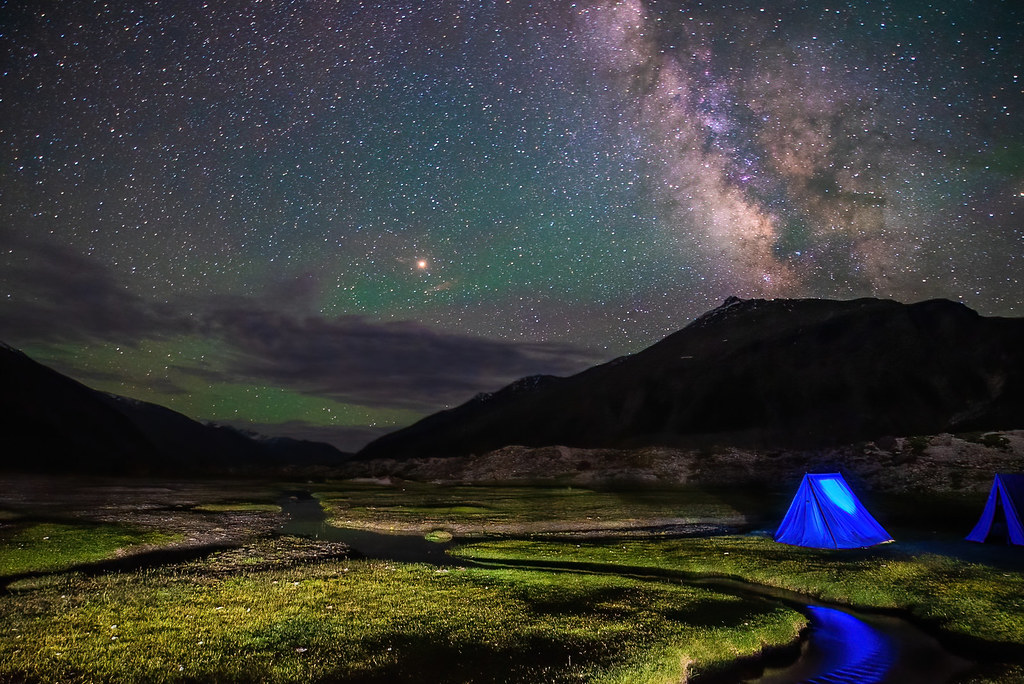
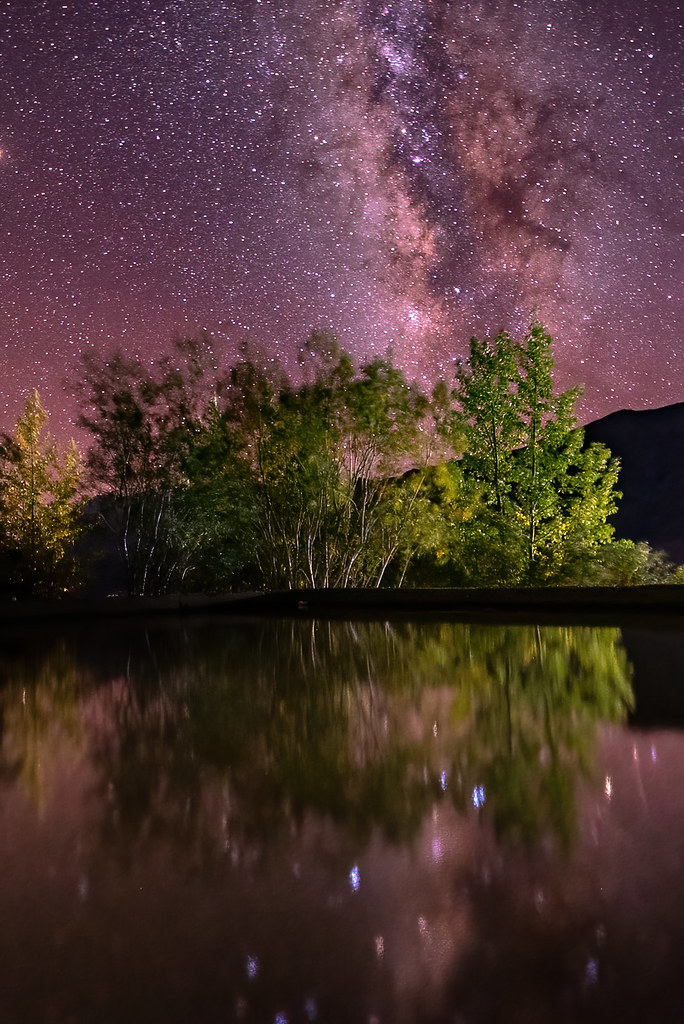
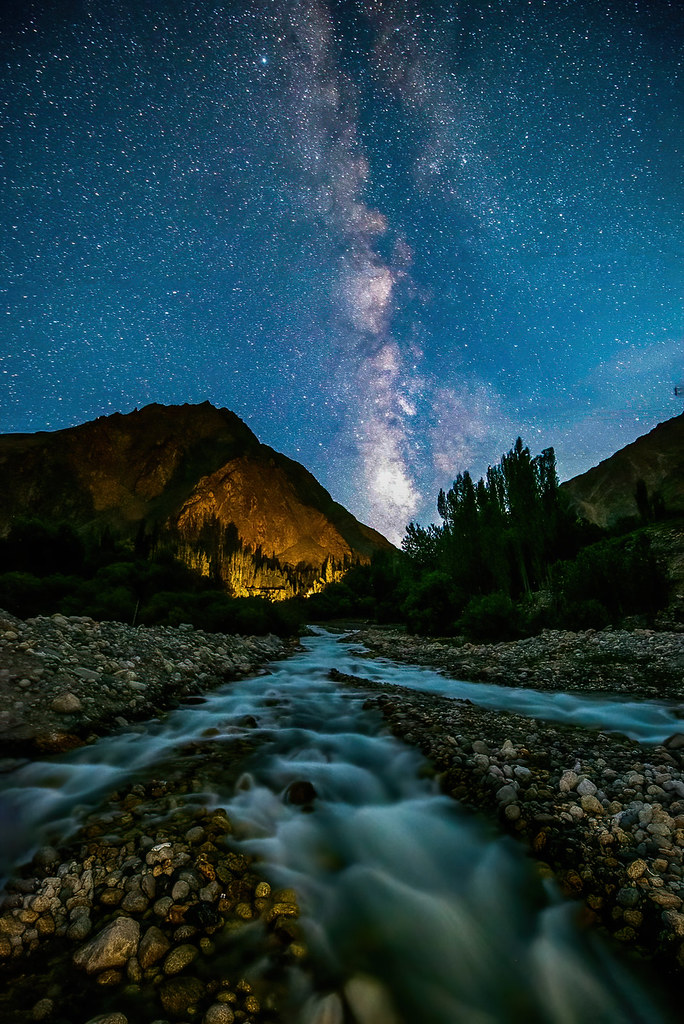
Milky Way at Batseri Village, near Chitkul, Sangla Valley, shot during our Photography Tour to Spiti Valley
What Is Needed For Astrophotography?
The first thing needed for astrophotography is burning passion. This is very important because one night you can get only one or two pictures. Imagine going for an 8-day astrophotography tour and coming back with only 12 good pictures. This is what happened to us when we went to Kutch.
What equipment is required for Astrophotography?
- Camera (dSLR or Mirrorless)
- Lens (Kit Lens or Wide angle lens)
- Tripod
- Remote Release (Even the camera app on phone will do)
- Intervalometer (required only for star trails)
Milky Way at Chandratal, Spiti Valley, shot during our Photography Tour to Spiti Valley
Best Camera For Astrophotography
Actually, you can have any camera that you can afford or rent. Having a full-frame camera really helps because of its low light capability. Having a wide-angle lens helps you to capture wider landscapes and makes better compositions of the Milky Way most of the time.
I use a Nikon Z6 and Nikon D850. Now Canon R5
Milky Way in Chitkul, shot during our Photography Tour to Spiti Valley
Best Telescope For Astrophotography In India
Actually, if you want to shoot the stars and Milky Way, you don't need a telescope. A DSLR with kit lens of 18-55mm is fine. If you have a full-frame dSLR with a wide-angle lens will be great but not essential.
Only if you want to see some deep-sky objects like the different Nebula, you will need a telescope. And they are expensive.
You can start with a binocular if you have one. Only if you are deeply interested, you can get a telescope.
This is one I will recommend - Celestron Astro Master
Drang Drung Glacier shot during our Photography Tour to Zanskar Valley, Ladakh
Steps for Doing Astrophotography
Finding the Location for Astrophotography
Ansel Adams said - A good photograph is knowing where to stand.
This is the most important factor for shooting the Milky Way. You can’t shoot it anywhere and everywhere. You have to find a dark place. With the kind of development that is happening, it is becoming more and more challenging to do astrophotography.
I use the website darksitefinder.com or lightpollutionmap.info/ to identify the areas roughly.

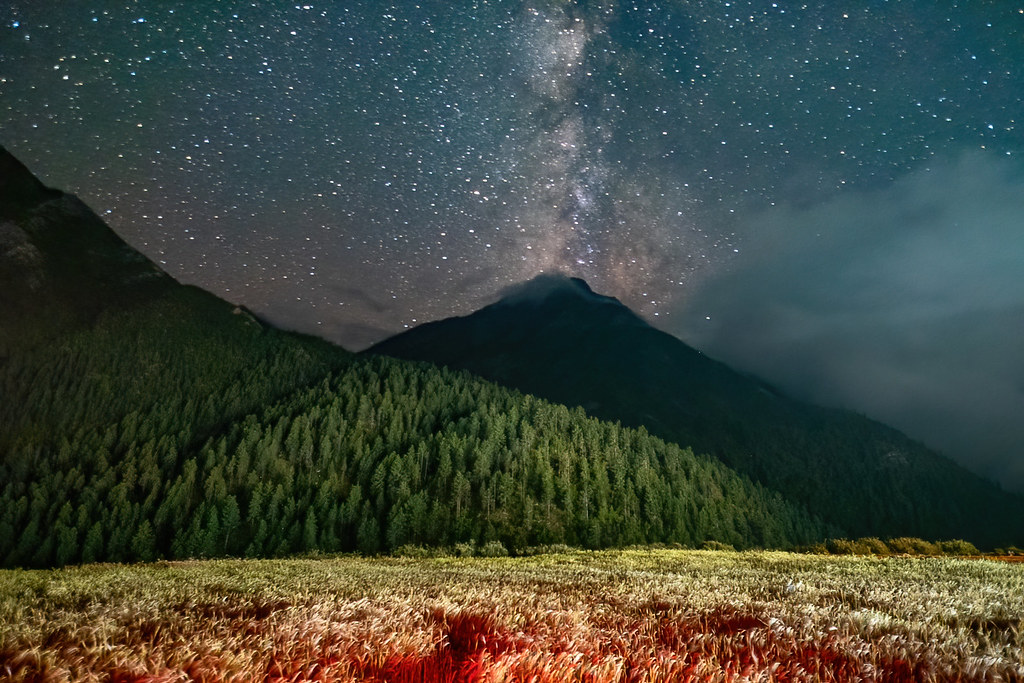
This was the most unexpected and unplanned location. While walking near our hotel in Kaziranga, we stopped and took this shot.
Planning for Astrophotography
Planning the time - when to go is critical. Need to check the moon's position and weather. Next is to spend time doing recce and finding compositions. Photopills is very helpful to plan your shots.
The Milky Way will look the same from any place in the world. It's the foreground that makes it look interesting. I try to add a local flavor to give the viewers a sense of place. It could be a man-made structure like a monastery or natural elements like a mountain.
Artificial light, even a small bulb can burn the shots, so that also has been kept in consideration. That is sometimes cannot be planned during the day.
Shooting
Best Settings for Shooting the Milky Way
Shutter Speed
Ideally, we would like to shoot at the lowest ISO, to get the least noise, but there is a limit to the longest shutter speed we can use. This is very critical because beyond that, the stars will lose their shape and will start forming trails.
To find the right shutter speed you have to follow the rule of 500.
Your shutter speed = 500/focal length
For example, if your focal length is 15mm, your maximum shutter speed should be 500/15 is 33.33 seconds.
If you are using a crop sensor camera, consider your crop factor and the effective focal length.
Aperture
Choose the widest open aperture (f/2.8 or f/3.5) to allow maximum light to enter, which will allow us to minimize the ISO.
This also means that the depth of field reduces if you have some foreground element very close to the camera. Understanding of Hyperfocal Distance of your camera and lens will help.
The workaround is to take a separate picture for the foreground and blend it later.
ISO
The ISO can vary based on the location. I keep it between 2500 to 4500.
In the camera, I put my long exposure noise reduction set to Off and High ISO Noise Reduction to Normal.
A lot of people use image stacking for Noise Reduction. It requires taking several shots at lower ISOs and stacking them to get less noise. You have to consider if it is worth the effort.
I do the noise reduction part in Lightroom and it works quite well.
White Balance
For Milky Way I generally keep the White Balance set to Auto and tweak it later in post-processing. Since I shoot in the RAW format, it's very easy to do so.
If you are shooting Star Trails, you can choose any of the preset While Balance but not Auto. It can be an issue to change it later if the camera recalculates every time.
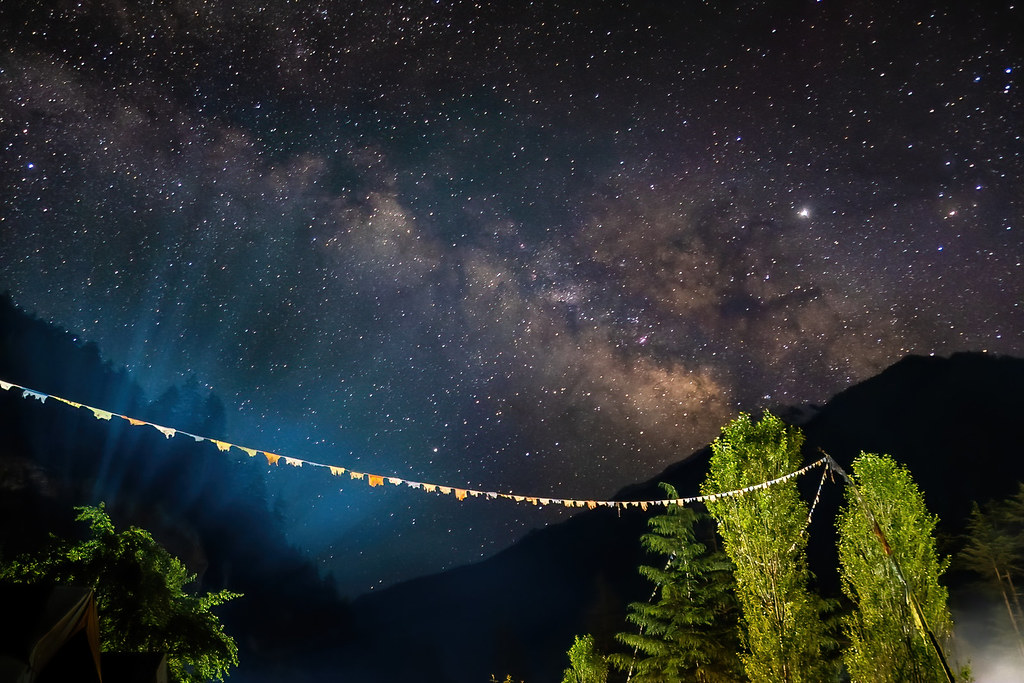
This was a very difficult location, on a very steep hill close to the Key Monastery. We could go up easily while going, but has a very tough time descending in the dark.

Astrophotography in Dholavira, Kutch, Gujarat shot during our Photography Tour to Kutch

Milky Way at Langza village, Spiti Valley shot during our Photography Tour to Spiti. Though looks easy, but very rarely this place has clear skies.
Focusing for Milky Way - Manual Focus only
Because of very less contrast, there is no way that the AF will work. So, the only choice is Manual Focus.
Some lenses have an infinity symbol marking. I recommend putting it to a little less than infinity. For lenses where infinity is not marked (like the 18-55 kit lens for a Canon), you can rotate the focusing ring to a little less than the left-most extreme. For a Nikon, it's a little less than the rightmost extreme. Sometimes you need to do a little trial and error.
The other way to focus is to use the Live View, zoom in to maximum and focus manually on a bright star by adjusting the focus ring to get it perfect.
Creating a Milky Way Panorama
You can shoot the Milky Way Panorama during the earlier part of the season. During that time, the Milky Way rises after the sun sets and you can get the whole arch.
Since it was way beyond the angle of view of my 15mm lens, I took 8 vertical shots and stitched them later. When you are doing a panorama, make sure you have roughly a 30% overlap between two frames. That will enable the software to make a seamless composition. I use Adobe Lightroom Classis to stitch the pictures and it does a great job.
Milky Way Panorama at Gonbo Rangjon, Zanskar, Ladakh shot during our Photography Tour to Ladakh

Milky Way Panorama at Jispa, Himachal Pradesh; shot during our Photography tour to Ladakh
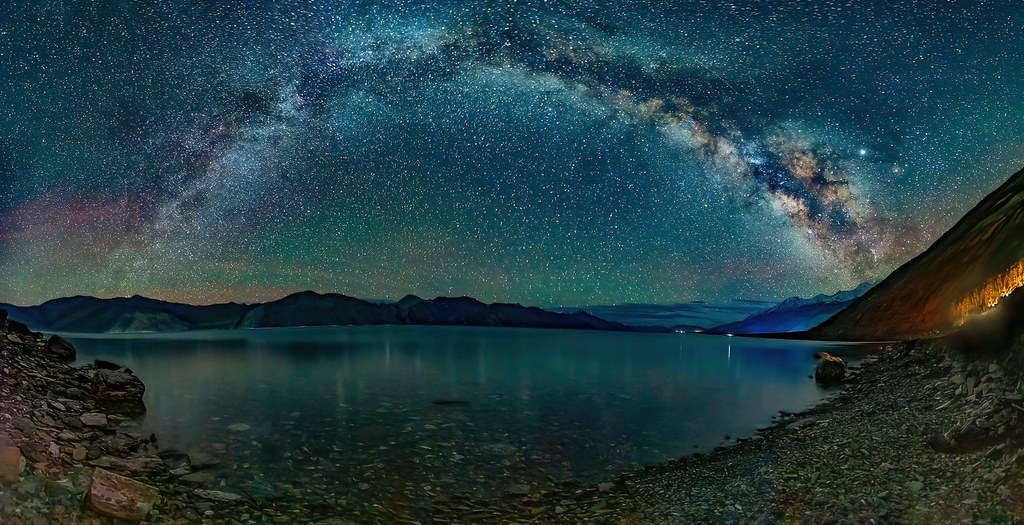
Milky Way Panorama at Pangong Tso, Ladakh shot during our Photography tour to Ladakh

Milky Way Panorama at Kutch shot during our Photography Tour to Kutch
Image Stabilization / Vibration Reduction
If you are using a lens with IS/VR, remember to switch it off as this can cause shaky pictures.
Exposure Delay
Even the flipping up of the mirror can cause vibrations and can spoil the picture. I use Exposure Delay Mode in my Nikon cameras, so the mirror flips up before the actual exposure starts. This eliminates the chance of any vibration caused by the mirror movement.
This is more beneficial compared to using the self-timer.
Shooting in RAW
Shooting in RAW file format is very critical to get the most out of your picture. The RAW file format has several advantages. You can check out my video here RAW vs JPG
Processing Milky Way / Star Trail Pictures
You will need software like Adobe Lightroom Classic and Photoshop to do the initial processing. You can also use the free software called StarStax to combine the star trails. For reducing the noise, you can use a software called Sequator or Topaz Denoise AI
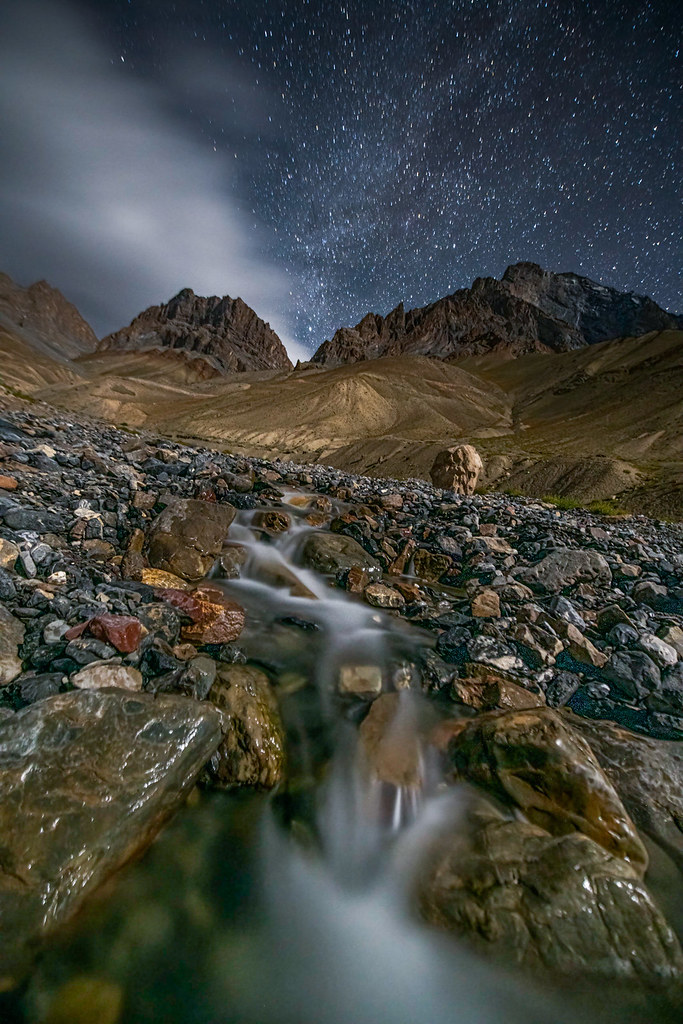
Milky Way near Lingshed, Zanskar Valley

Milky Way at Tabo, Spiti Valley shot during out Photography Tour to Spiti
What Is The Best Time For Astrophotography
Milky Way Galactic Core Rising Time
The best time for Astrophotography depends on the rising time of the Milky Way. In the Indian-subcontinent, during the winters, the Milky Way rises early in the morning and hence the window that you get is very less.
So, the best time to shoot the Milky Way is from April to September.
Best Time for Milky Way Photography
First thing is that you will have to avoid the Moon. You will have to choose any time where there is minimal overlap between the Milky Way Galactic core visibility timing and the Moonrise timing.
For example, if the Galactic core visibility starts at 10pm and the Moonrise is at 11pm, you will get an hour to shoot.
However, there is another factor as well. Say, the sunrise time is 6am and you are standing in front of a huge mountain, it might take hours before you can actually see the sun. Similarly, for the GC to be captured in your camera, it could be much later compared to the rising time.
You may use an app like PhotoPills to determine that.
What time of the year is good for Milky Way Photography
The Milky Way is visible all around the year. When we are talking about the best time for photography, are are referring to the visibility of the Galactic Core which is the most important, interesting and colourful part of the MW. It actually looks like a cloud but as you get yourself familiar with it, you will be able to identify it.
In the Northern Hemisphere, the GC rises early in the morning and sets before sunrise.
Please note that I’m talking with respect to NorthernIndia and the Indian Himalayas. The timings will vary based on your geographical location.
Let's start from January and explore the other months.
Milky way Galactic core photography in January is difficult. For example, this year, the GC visibility starts and ends at 5:55am IST, so you don’t get any time at all to photograph it.
As the days progress, the GC visibility gets earlier by 4 mins every day, so you get more time.
For example, on 31st Jan 2025, the GC visibility starts at 440am and ends at 551am.
There is another problem - the Sunrise time. There are some places where the sunrise time is very early, like in Arunachal Pradesh, or any other place in the eastern part of India. So, if the GC visibility starts at 440am and the sunrise is at 530am, you will barely be able to shoot as it will be the time of Naughtical Twilight followed by the Blue hour.
In February, the GC visibility starts from 300hrs and ends at 533hrs, so you get some time.
In July, the GC is visible after it gets dark 2100hrs and sets at 0300 hours, so we get enough time.
In September, the GC is visible at about 1930 hrs till 2241 hours, so we can shoot quite early and finish.
In October, the GC is visible at about 1900 hrs till 2115 hours, so as you can see, the time for visibility gets narrower.
The Angle of the Milky Way
During the early months, the MW is more parallel to the horizon, which is great for panoramas. Later part of the year, like September or October, it gradually becomes more vertical.
Also, while rising, the MW is low and gradually starts getting vertical with time.
If you want to do Milky Way Photography Composition with Specific foreground elements (Mountains, Historic Structures, etc), you will have to check the right time of the year.
In which Direction the Milky Way is visible
The Milky Way rises from some south eastern direction and keeps shifting towards the south direction with subsequent months.
See the MW taken from the same location in different directions at different times of the year.


Weather
Mid June is the onset of the monsoon in India, hence, it will be difficult to shoot in most places in India. However, places like Ladakh and Spti don't have much rains and is suitable even during those times of the year.
Moon Position
As the Moon rises, the Milky Way fades out. So, if you want to shoot the Milky Way, you have to choose a time when has either set before you start or rises after you are done with your pictures.
Not necessarily, it has to be on the New Moon night as many people say. The moon has to be absent, during your time of the shoot, that's it.
Applications / Software required for Astrophotography
Mobile Applications required for Astrophotography
Photopills App
The most useful app required for Astrophotography is Photopills. It's a paid app but indispensable for astrophotography. It can help you plan your shot way ahead of time.
I can’t recommend that app enough.
StarTracker
You can map the various celestial objects like Moon and Mars or Venus or the North Star using this free app.
Computer Applications required for Astrophotography
You will need software like Adobe Lightroom Classic and Adobe Photoshop to do the initial processing.
You can also use the free software called StarStax to combine the star trails. For reducing the noise, you can use a software called Sequator or Topaz Denoise AI
Should we Stargaze or do Astrophotography?
Well, that's your choice. I do both. At one point in time, I realized that I am so busy taking pictures that I did not find time to enjoy the heavenly sight with my eyes. So, now that I have set my camera and it's doing its job taking pictures, I spend time gazing at the stars.
If you have no interest in taking pictures, you can stargaze full time. Its bliss.
We photographers have to really be busy setting up things, but we capture something for a lifetime, something that can be shared with the world to enjoy.
Milky Way at Turtuk, shot during our Photography Tour to Ladakh
Best Places for Astrophotography or Stargazing in India
How to Find Suitable Locations for Milky Way Photography
The best way to find a suitable location which is dark is by using the Light Pollution Map. Here the darkness is indicated by a number which denotes the Bortle Scale. Class 1 is the darkest. As the number increases, it get brighter.
Till Class 3, you will get good shots. Class 4 and more, you will barely be able to see the MW.
You can use the map to find locations closer to your place, try and take a few pictures, master the techniques and then go to far places like Ladakh and Spiti for photography. Of course, if you are joining my tours, I will definitely help you to take good shots even if you are new.
I have tried astrophotography shooting stars in various places in India.
Ladakh is hands down my favorite place for astrophotography. My second favorite place is Spiti Valley, Himachal Pradesh.
Do read this article on Best Places for Milky Way Photography in Ladakh.
There are hardly any other places where there is less light pollution.
Places for Astrophotography in Gujarat
Kutch has some great locations for astrophotography. There are many small places around Bhuj where you can get some amazing pictures. There is light pollution but you can still take some great pictures.
North-Eastern states of India also have great opportunities. Some pockets in Odisha and Chhattisgarh is also great.
Places for Astrophotography around Mumbai during the weekend
Some places around Satara like Chalkewadi, Naneghat, and Malshej Ghat, Pawna Lake, Junnar, Sandhan Valley are some of them where you can go and do astrophotography but with significant light pollution. Asangaon, Igatpuri, Bhandardhara, Malshej Ghat, Mahuli, Sandhan Valley, Kalsubai Harischandragad Forest Sanctuary, Samrad Ghatghar, Dehne village, Wada region, Konkan region from Ratnagiri to Vijaydurg, Velas village, Ladghar Beach Dapoli, Taila Baila Fort, Sudhagad Fort, Naneghat to name a few
You can also try going to Vansda in Gujarat, not very far from Mumbai.
But, you can’t avoid light pollution. So, it can never be like in Ladakh or Spiti.
Astrophotography Ideas
My idea of a great Milky Way picture is to have a strong foreground with compositional elements, if possible like leading lines or something that gives a sense of place like a monastery, anything local.
There are a lot of people who use fancy lights and place a model and do all sorts of funny stuff to be used as a foreground. Most people do that.
I personally don't like to destroy the foreground doing these. It's like lighting a lamp in front of the sun, is it really required? Why would I want my viewers' attention to divert from the glorious Milky Way to some cheap and colorful LED lights?
In my opinion, the Milky Way is the hero of the image (the main subject) and it should remain like that. Of course, we need to include some elements in the foreground to give a sense of place and make an interesting composition.
This is my personal opinion and you are free to do it if you like it. You will surely get a lot of likes on Facebook and Instagram having sexy models and making them stand and paint the subject or around with lights. This is definitely the IN thing amongst the young photographers. A lot of people also use the steel wool to make the foreground more interesting but again, you are diverting your attention from the hero of the image, that is the Milky Way.
Practical Issues for Astrophotography
No matter you much of an expert you are having the best gear, it is impossible to take a picture unless you are able to go to the location at the right time.
The first issue is that all hotels lock their doors at night. It will be a good idea to talk to the hotel persons, let them know that you are going out at night so that you know the way to go out.
Having a vehicle, or informing the driver, making him mentally prepared for going. Unless you have a vehicle or having a driver for a taxi who is willing to go at night, it will be difficult.
These are very important homework you need to do.
Astrophotography Milky Way Photography Tours in India
I organize astrophotography or Milky Way tours in different parts of India. My favourite places are Ladakh and Spiti. So if you are interested to join me as an individual or a group, I will be happy to take you to the right places at the right time and make sure that you get your shots.
Some helpful videos -
Tips for photographers
Must Read these links if you need Information on Travelling to Ladakh / Spiti
Milky Way Photography Spiti Valley
Best Places for Landscape Photography in India
Join My Spiti Photography Tour
Join My Ladakh Photography Tour
If you want a customized tour anywhere in India focused on Photography, I will be happy to organise it for you.
Thanksgiving
Thanks to all the participants who joined my Astrophotography Tours.All rights reserved. No copying without permission of the author Saurabh Chatterjee